
With this post I’m going to tell you about how to configure and implement connection between IBM MQ version 7.5 with ccdt file (client channel definition table)… So I’m going to explain you about Server-Client MQ model.
First of all we need to have a privileged user in our MQ server (here after I refer IBM websphere MQ as simply MQ).

MQ user
just make sure you grant that user to MQ administrator permissions. If your current user hasn’t enough permission then you can log in with user with MQ administrator permissions.
Once you have done with your user permissions , open MQ in administrator in administrator mode. Let’s create a message queue manager in MQ. We can call it QM_CCDTTest , here you can what ever you like.
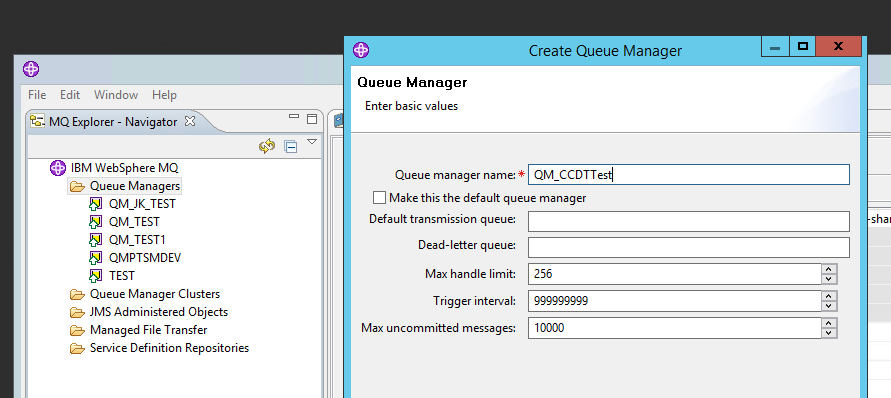
Create Message Queue
next important step is setting up listener’s port. You will connect to this queue through this port number. You can scan current ports with “netstat -an” in your command prompt (Windows CMD). By the time being we set this as 1456
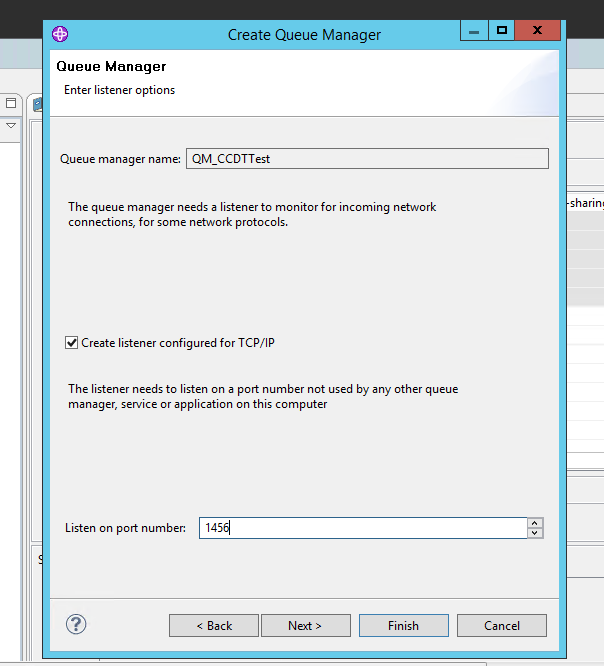
Listener’s port
ok next thing is creating a local queue
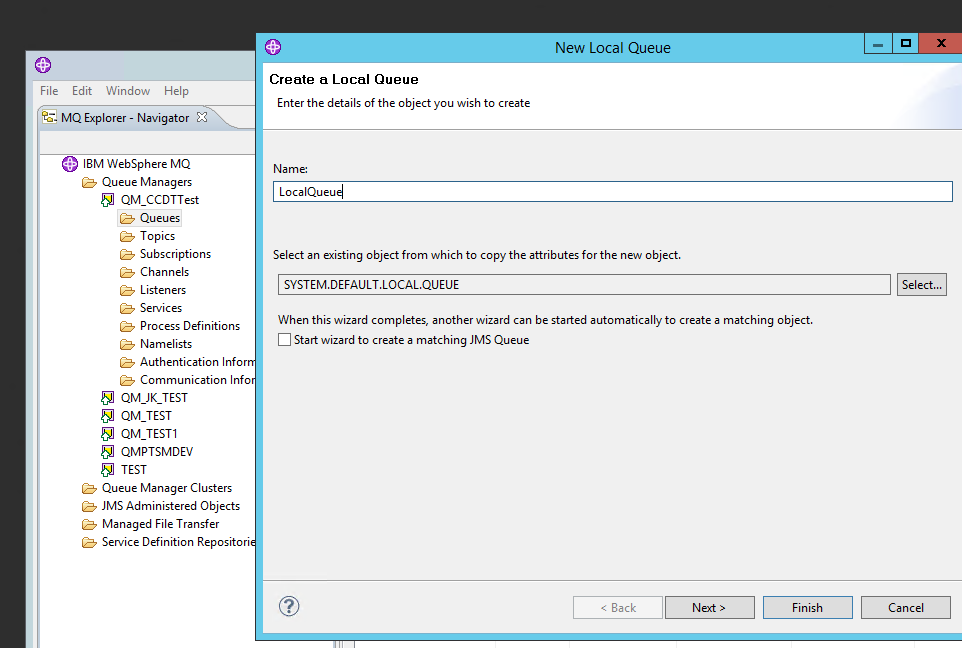
Create Local queue
pretty easy isn’t it ??? just make sure to select Local Queue
Time to create a channel. This one should be server-connection channel ( NOT Server channel )
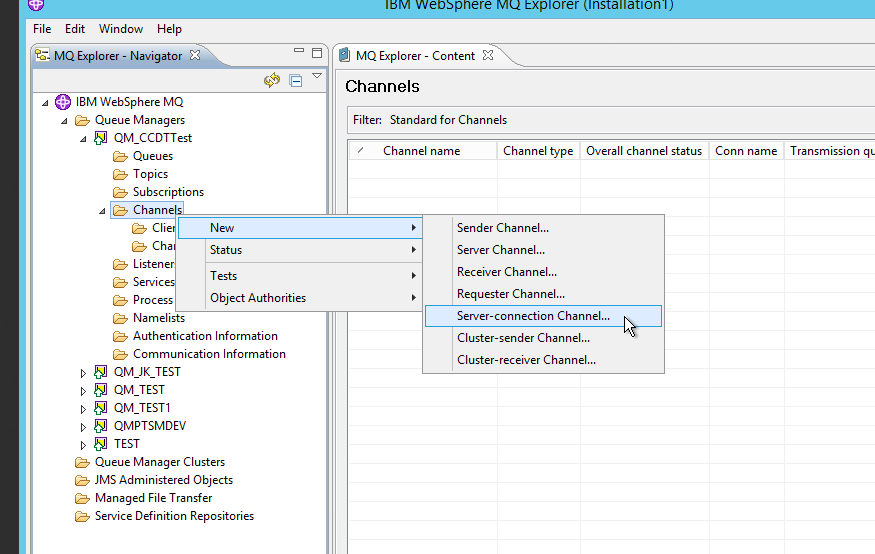
create a server connection channel
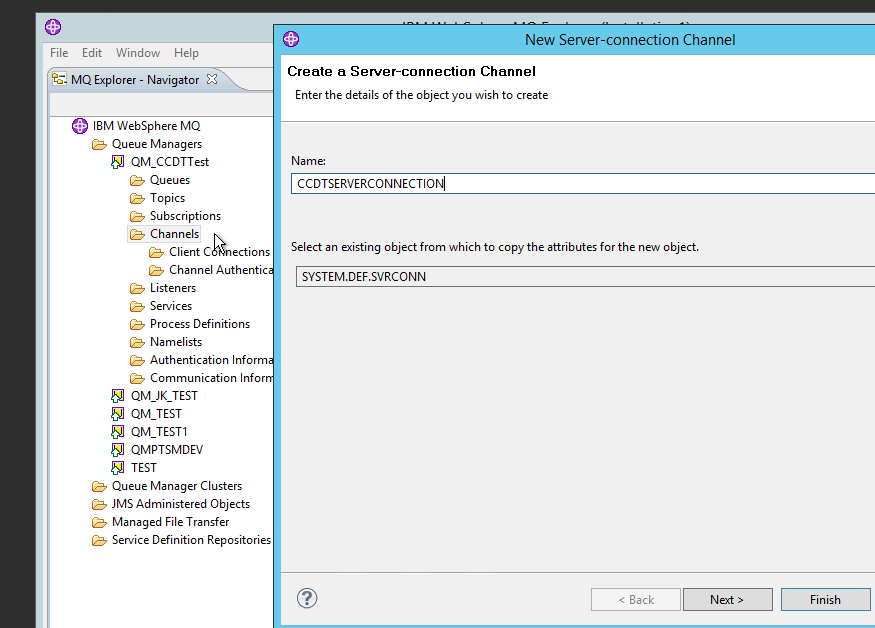
create a Channel
There are few things to remember when you create server connection channel you need to set following properties in channel properties and these things
- Give uppercase name and you need to set this same name in client connection
- Set MCA User Id
- set SSL authentication
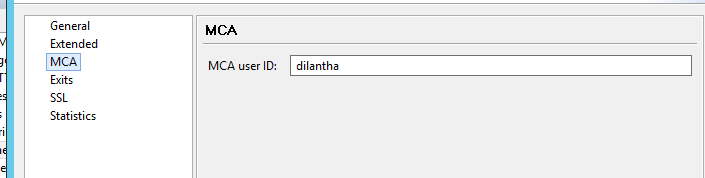
set MCA user id
for this option you can give previously created MQ admin privileged user name . So in my case I set it this name.
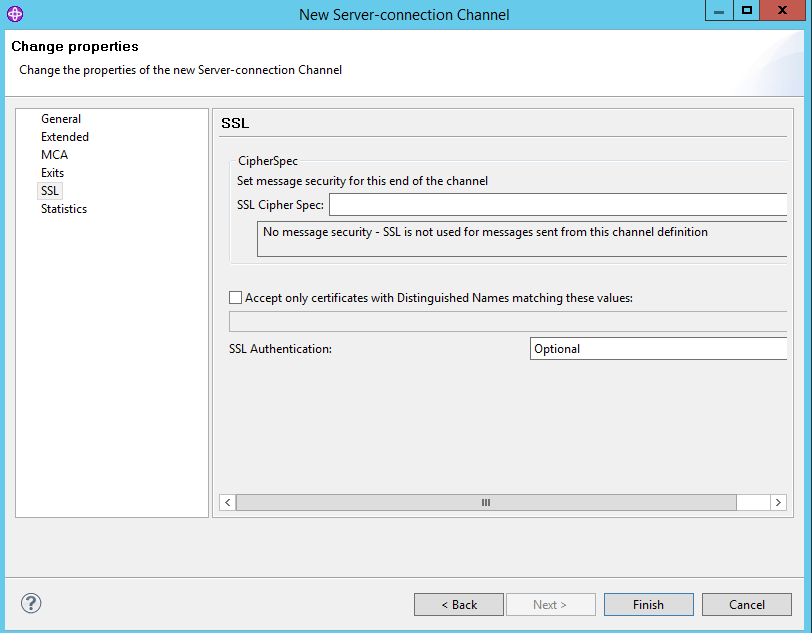
SSL property
if you are not going to use ssl authentication just set it as “Optional”.
After this , create client connection. This will be going inside the CCDT file and you have to use the same name you already set for server channel ( need to be in upper case letter and same as server channel )
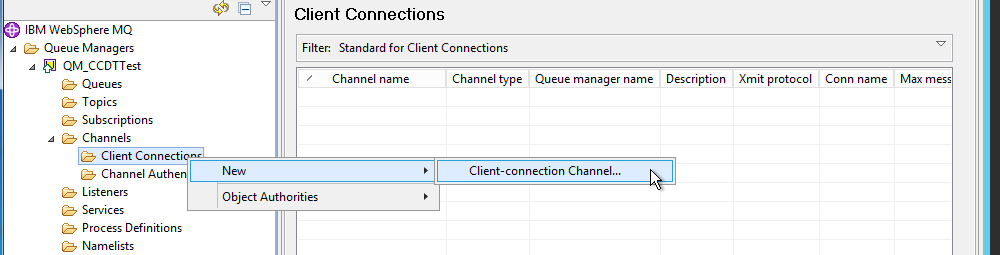
Create client connection
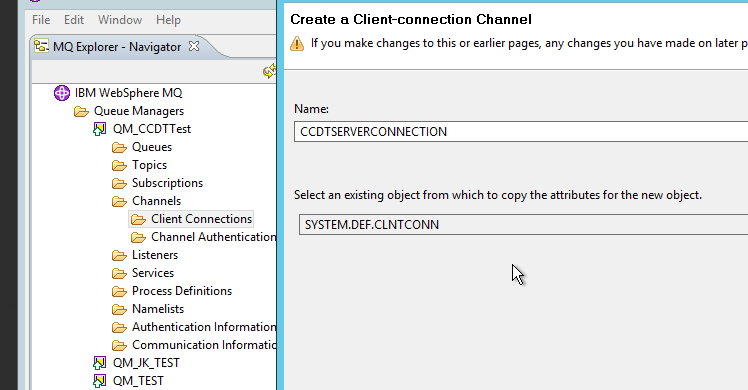
create client channel
set these properties on the created client connection .
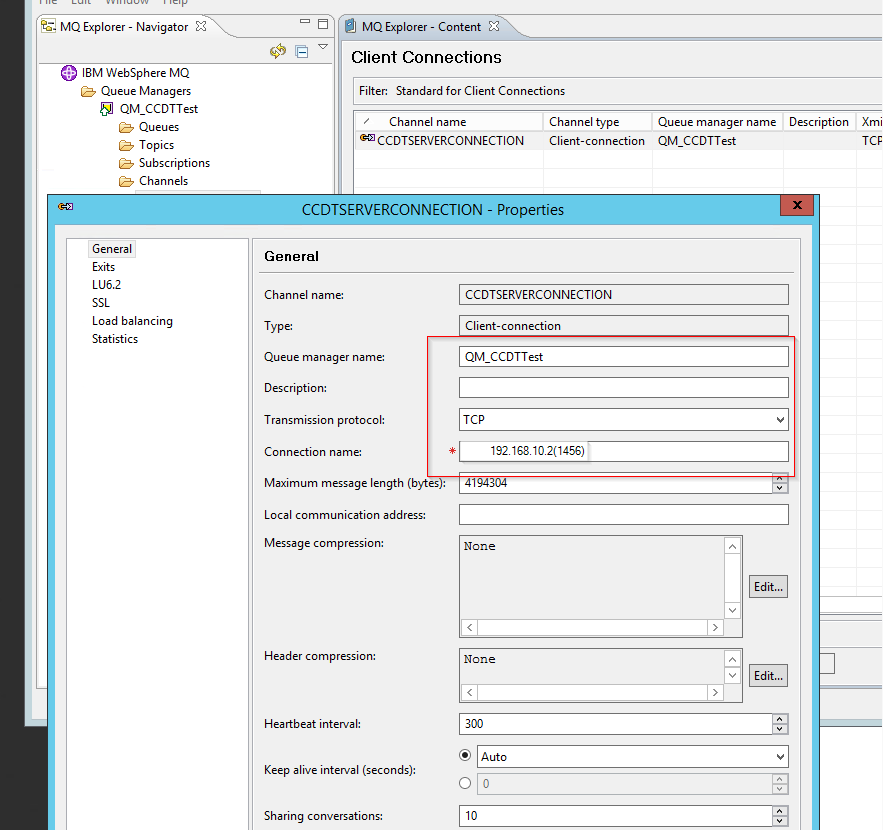
client connection properties
In the connection name you need to give host name which your MQ installed and Listener’s port number as shown in the image.
Ok then come to the next level – Channel authentication. By default there will be record for blocking *MQADMIN.
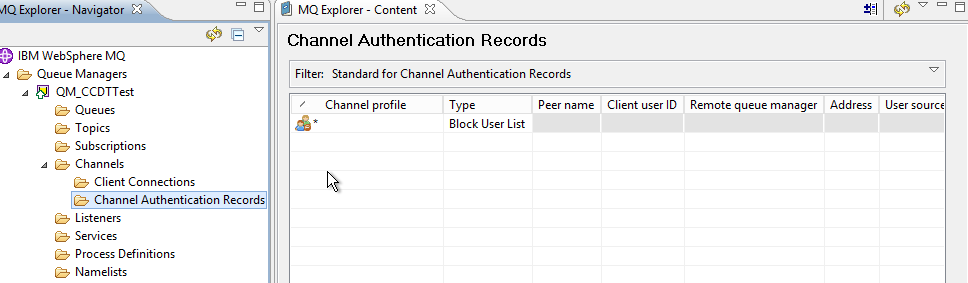
Channel authentication
So we are almost done with configuration. Time to fetch the CCDT file. Go to your MQ installation directory. Most probably it will be something like this
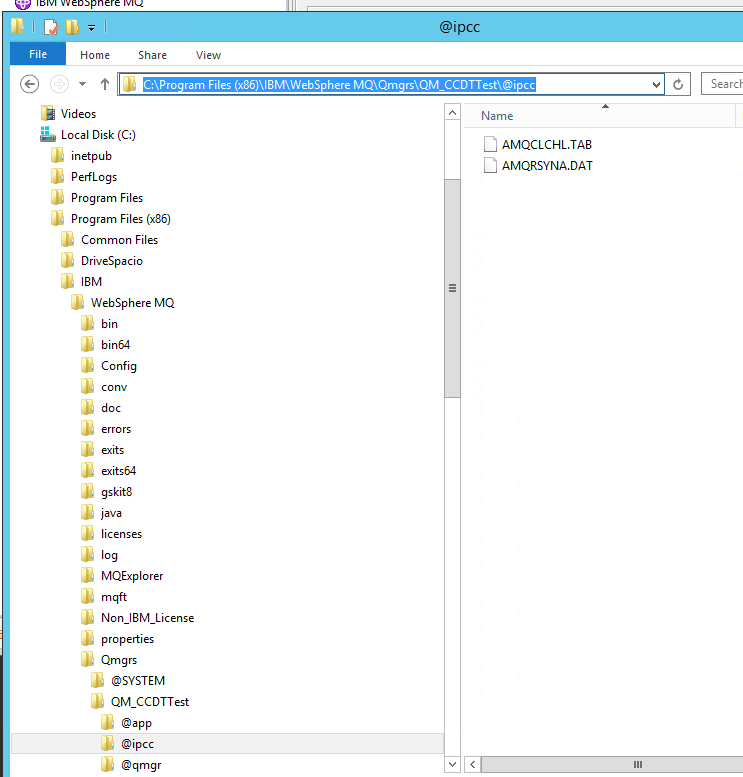
CCDT file path
copy AMQCLCHL.TAB file to your client computer. So we are going to refer this file and file path to make connection between MQ server. I put this file in my D:\MQCCDTTEST folder you can keep it where ever you like . Only thing you need to know is set that path correctly in your environment variable.
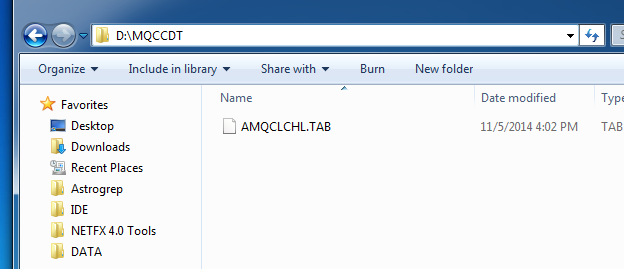
My CCDT file path
I’m going to show you two ways connecting with MQ server one with C# application and other one with MQ explorer
so let’s try with MQ explorer
open your MQ explorer in client computer
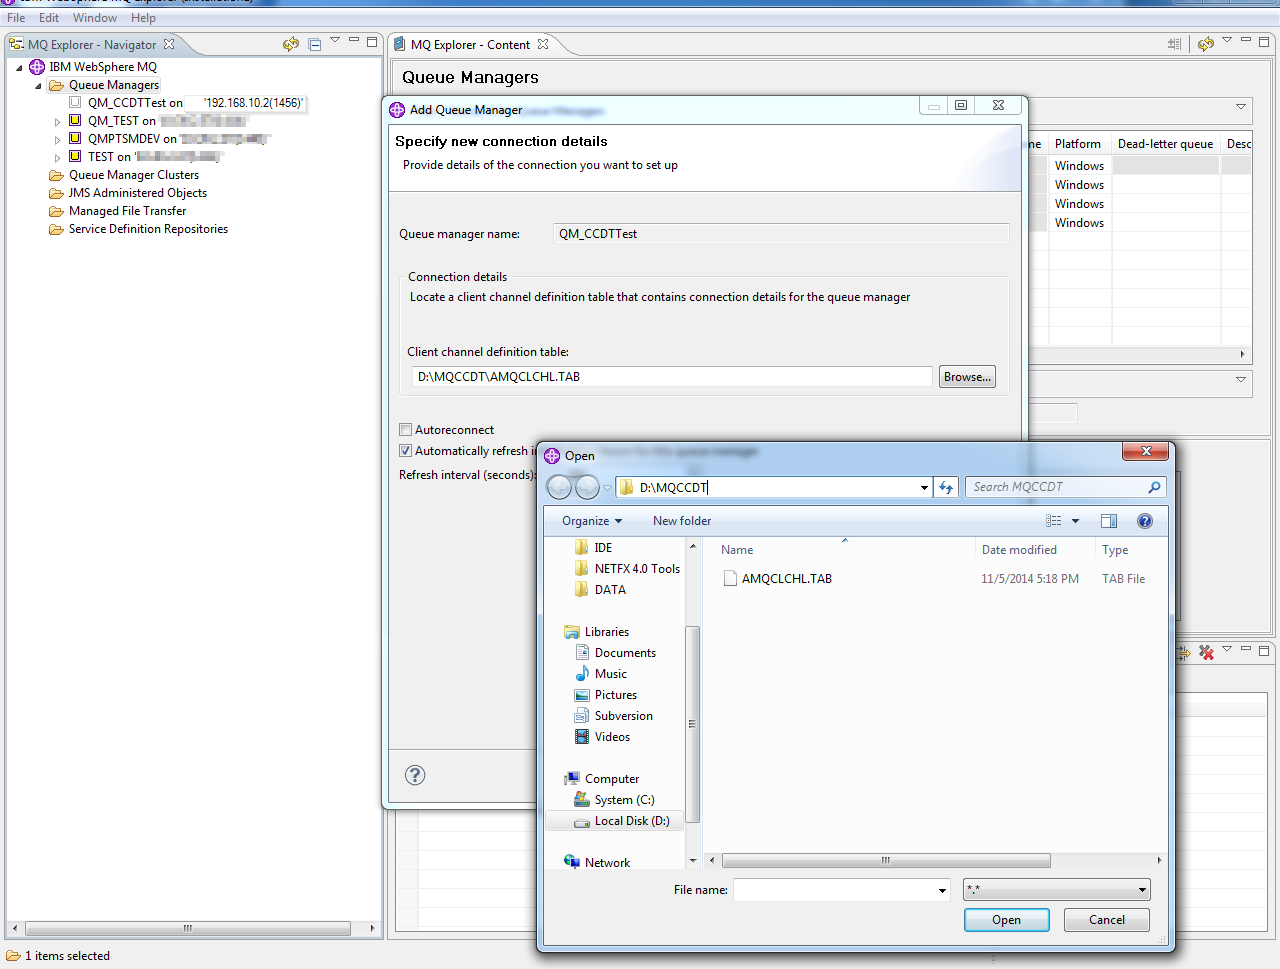
MQ explorer connection with CCDT
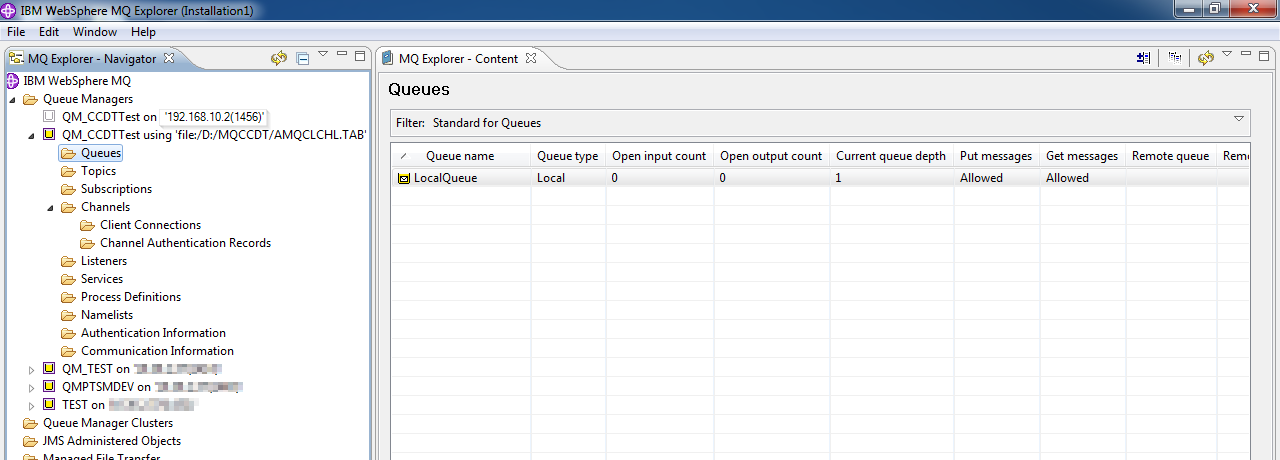
Right click on Queue manager and create a new Queue . Give the same name you already set in your MQ . In my case QM_CCDTTest. Then select connect using with CCDT file (second option) and choose the AMQCLCHL.TAB file. Once you complete this one you will be ended up with following screen
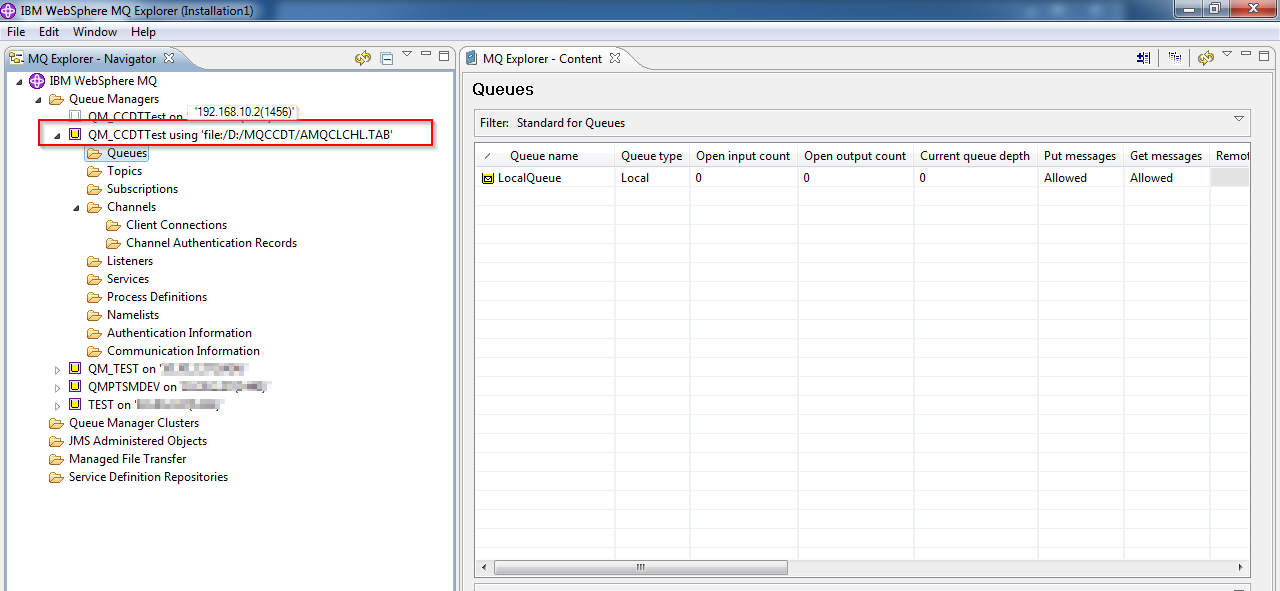
MQ Explorer client connection with CCDT
From here on, you can browse your queue’s message , put message …etc
Connection with C# console application
First you need to add amqmdnet.dll reference to your project. You can find this dll in MQ explorer installation directory
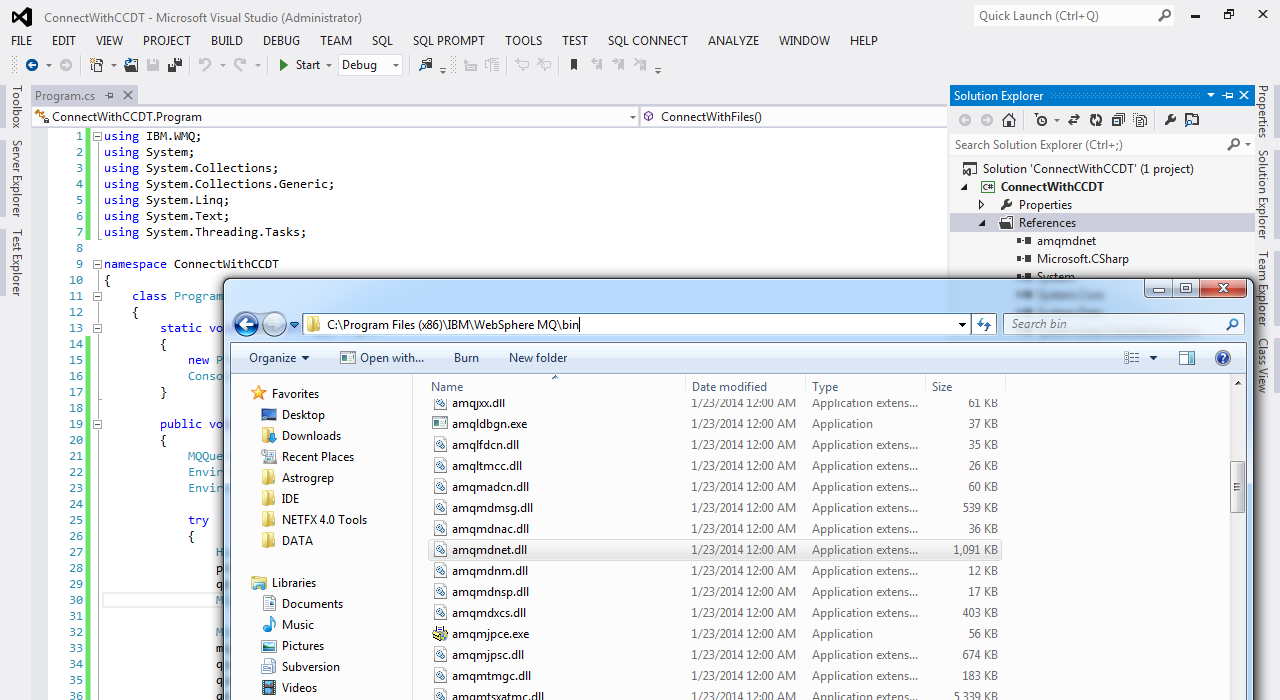
amqmdnet.dll
Create a console application and following code to your project. The only thing you need to connect to MQ is setting environment variables
Environment.SetEnvironmentVariable(“MQCHLLIB”, @”D:\MQCCDT\”);
Environment.SetEnvironmentVariable(“MQCHLTAB”, “AMQCLCHL.TAB”);
using IBM.WMQ;
using System;
using System.Collections;
using System.Collections.Generic;
using System.Linq;
using System.Text;
using System.Threading.Tasks;

namespace ConnectWithCCDT
{
    class Program
    {
        static void Main(string[] args)
        {
            new Program().ConnectWithFiles();
            Console.ReadLine();
        }

        public void ConnectWithFiles()
        {
            MQQueueManager qm = null;
            Environment.SetEnvironmentVariable("MQCHLLIB", @"D:\MQCCDT\");
            Environment.SetEnvironmentVariable("MQCHLTAB", "AMQCLCHL.TAB");

            try
            {
                Hashtable props = new Hashtable();
                props.Add(MQC.TRANSPORT_PROPERTY, MQC.TRANSPORT_MQSERIES_CLIENT);
                qm = new MQQueueManager("QM_CCDTTest", props);
                MQQueue queue1 = qm.AccessQueue("LocalQueue", MQC.MQOO_OUTPUT | MQC.MQOO_FAIL_IF_QUIESCING);

                MQMessage msg = new MQMessage();
                msg.WriteUTF("Test Message");
                queue1.Put(msg);
                queue1.Close();
                qm.Disconnect();
                Console.WriteLine("Success.");
            }
            catch (Exception ex)
            {
                Console.Write(ex);
            }

        }
    }
}
once you execute this code you can see it on the queue
MQ Explorer final message

Pingback: Transport level security with IBM WebSphere MQ in .net environment | Writing Wall
Reblogged this on Dinesh Ram Kali..